从3D Studio Max中导入模型到Unity3D

原文:http://unity3d.com/support/documentation/Manual/HOWTO-ImportObjectMax.html,由威阿翻译,转载请注明来处

Importing Objects From 3D Studio Max
3D Studio Max导入物体

Unity Manual > FAQ > How do I import objects from my 3D app? > Importing Objects From 3D Studio Max Unity首测>常见问题解答>我如何从我的3D软件导入物体?>从3D Studio Max导入物体 If you make your 3D objects in 3dsMax, you can export them into Unity using the Autodesk .FBX format. 如果你在3dsMax中制作你的3D物体,你可以输出为Autodesk.FBX格式到Unity中使用.
1. Download the latest fbx exporter from Autodesk website and install it. 从Autodesk Website下载最新的Fbx输出插件并安装.
2. Export your scene (File->Export or File->Export Selected) in .fbx format on your PC. Using default export options should be okay. 在Pc上输出你的场景为.fbx格式(File->Export File->Export Selected),用默认输出选项可能不错.
3. Move the exported fbx file into your Unity project folder on the Mac. 移动输出的Fbx文件到你Mac上的Unity工程文件夹.
4. When you switch back into Unity, the .fbx file is imported automatically. 当你切换到Unity,这个.Fbx文件将自动导入.
5. Drag the file from the Project window into the Scene view. 从工程窗口拖拽这个文件到场景视图中.

Unity currently imports from 3ds Max Unity

可以从3dsMax导入的:
1. All nodes with position, rotation and scale. Pivot points and Names are also imported. 所有节点的位置,旋转和缩放,轴心和名字都可以被导入.
2. Meshes with vertex colors, normals and one or two UV sets. 和网格有关顶点颜色,法线和一个或二个Uv
3. Materials with diffuse texture and color. Multiple materials per mesh. 固有纹理和颜色的贴图.多维材质.
4. Animations. 动画
5. Bone based animations. 基于骨骼的动画.

Exporter options

输出选项
Using default FBX exporter options (that basically export everything) should be okay in all cases. 可以用Fbx预置的选项处理大多数的输出情况.
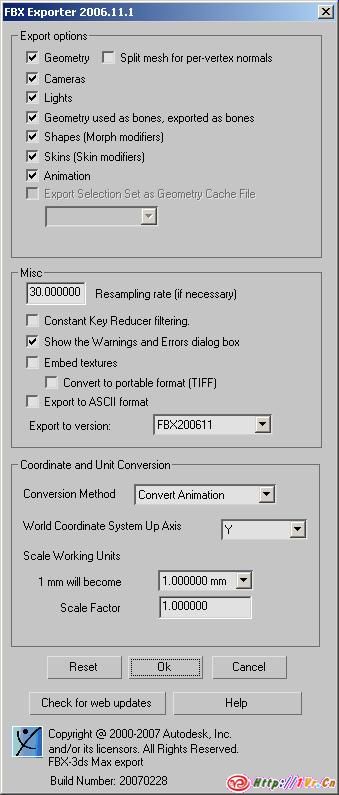
Default FBX exporter options (for fbx plugin version 2006.11.1) 预置Fbx输出选项(fbx plugin version 2006.11.1))
Exporting Bone-based Animations

输出基于骨骼的动画.
There is a procedure you should follow when you want to export bone-based animations: 如果你想导出基于骨骼的动画,可以参考下面的步骤.
1. Set up the bone structure as you please. 倾力架设一个骨骼结构
2. Create the animations you want, using FK and/or IK 创建你想要的动画,用FK或IK
3. Select all bones and/or IK solvers 选择所有的骨骼或者IK
4. Go to Motion->Trajectories and press Collapse. Unity makes a key filter, so the amount of keys you export is irrelevant 转到Motion->Trajectories并按下Collapse.Unity过滤掉不相干的关键帧
5. “Export” or “Export selected” as newest FBX format “Export” 或”Export selected”一个新的Fbx文件.
6. Drop the FBX file into Assets as usual 和往常一样拖拽Fbx文件到Assets
7. In Unity you must reassign the Texture to the Material in the root bone 在Unity中你必须在指定贴图材质到基本骨骼.

When exporting a bone hierarchy with mesh and animations from 3ds Max to Unity, the GameObject hierarchy produced will correspond to the hierarchy you can see in “Schematic view” in 3ds Max. One difference is Unity will place a GameObject as the new root, containing the animations, and will place the mesh and material information in the root bone. 当从3dsMax中输出一个含有骨骼的网格和动画, 游戏物体将产生对应的层级,你可以在3dsMax的”Schematic view”看到.不同的是,Unity中将设立一个物体做为新的含有网格和材质贴图的基础骨头. If you prefer to have animation and mesh information in the same Unity GameObject, go to the Hierarchy view in 3ds Max, and parent the mesh node to a bone in the bone hierarchy. 如果你希望Unity中在同一个游戏物体上拥有动画和网格信息,到3ds Max的层级视图,和在骨骼层级到父网格节点.
Exporting Two UV Sets for Lightmapping
为光影贴图输出两个Uv贴图
3ds Max’ Render To Texture and automatic unwrapping functionality can be used to create lightmaps. Usually one UV set is used for main texture and/or bumpmaps, and another UV set is used for the lightmap texture. For both UV sets to come through properly, the material in 3ds Max has to be Standard and both Diffuse (for main texture) and Self-Illumination (for lightmap) map slots have to be set up: 3dsMax的渲染到纹理和自动展开功能可以用来建立光影图.通常一层UV是用于主要纹理或凹凸贴图,而另外一层UV是用来光影图.材质在3ds Max中通过标准的固有色(主纹理)和自发光(光影图)来设定:
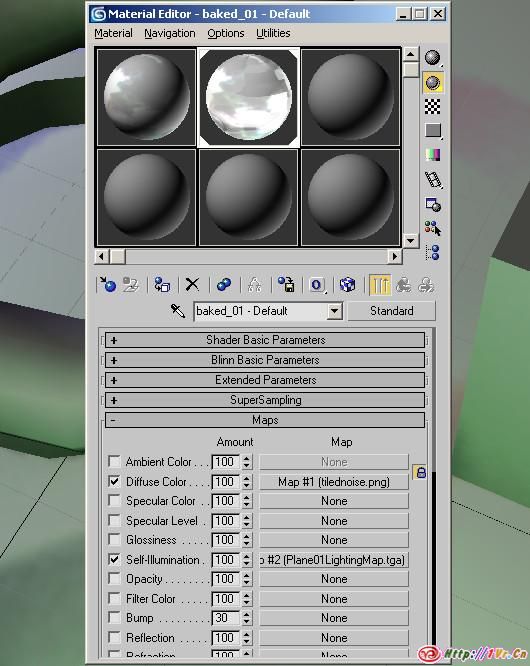
Material setup for Lightmapping in 3ds Max, using self-illumination map 在3dsMax中调整光影图材质,使用self-illumination map. Note that if object uses a Shell material type, then current Autodesk’s FBX exporter will not export UVs correctly. 提示:如果物体用一个外壳材质类型,那么现在的Autodesk’s Fbx输出器还不能正确的输出Uvs. Alternatively, you can use Multi/Sub Object material type and setup two sub-materials, using the main texture and the lightmap in their diffuse map slots, like shown below. However, if faces in your model use different sub-material IDs, this will result in multiple materials being imported, which is not optimal for performance. 另外,你可以用多为材质类型和设定两个子材质,使用主纹理和其光影图在他们的固有贴图槽.如下所示.但是,如果在你的模型上使用不同的子材质ID,这将导致多个材质导入,这将不是最佳的性能.
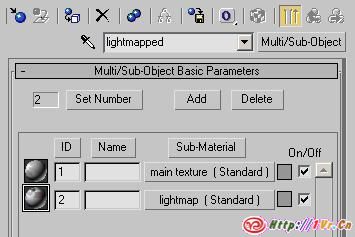
Alternate Material setup for Lightmapping in 3ds Max, using multi/sub object material 在3dsMax中调整光影图,用多维子材质.
Troubleshooting
故障处理
If you have any issues with importing some models: ensure that you have the latest FBX plugin installed. It can be downloaded Autodesk website. 如果你对导入物体有任何问题,请确保你的Fbx插件是最新的.你可以从AutodeskWebsite更新.
Unity3D for iPhone使用入门与UnityRemote

注:Google页面翻译,非人工.原文链接:http://www.unifycommunity.com/wiki/index.php?title=IPhone_Getting_Started_with_the_UnityRemote

Unity3D for iPhone使用入门与UnityRemote
From Unify Community Wiki从统一社区维基
Jump to: navigation , search跳转到: 导航 , 搜索
This tutorial is still VERY rough but hopefully they will still be helpful in its current form.本教程仍然十分粗糙,但希望他们仍然是有帮助的现有形式。

If you have a minute and know your way around wiki formatting, please feel free to beautify this page.如果你有一分钟,并且认识自己的方式解决的wiki格式,请随时美化这一页。

NOTE: I didn’t think to start writing this until after I was done registering, so if you are following this tutorial and you notice something that I missed, PLEASE help out by extending this tutorial with whatever you figure out. 注意:我没想到,开始写这本之后,我做登记,因此,如果您是本教程之后,您的通知,我错过了, 请伸出你的援手,扩大本教程与你搞清楚。 At the moment, almost everyone is having problems getting things configured the first time. 目前,几乎每个人都上有问题的东西第一次配置。

Contents目录  [hide]
1 Register & Download 1 注册和下载
2 Register your Device & Fetch App ID 2 注册您的设备及撷取应用程序编号
3 Setup Unity iPhone 3 安装统一iPhone手机
4 Establish Network Connection 4 建立网络连接
5 Run UnityRemote 5 运行UnityRemote

[ edit ] Register & Download [ 编辑 ] 注册和下载
Register as an iPhone Developer , if you have not done so already.注册成为iPhone手机的开发 ,如果你还没有这样做。 This part does not cost anything, and will allow you to download the iPhone SDK and view all the developer documentation for the iPhone.这部分没有任何费用,并允许您下载的iPhone SDK和查看所有的开发者文档为iPhone 。 You will find the link on the right side of the page.你会发现上的链接页面右侧。
Download the iPhone SDK (~1.6GB) from the Apple iPhone Dev Center .下载的iPhone的SDK ( 〜 1.6GB )由苹果iPhone开发中心 。 The SDK includes the latest XCode toolset, so there is no need to install it separately.该SDK包括最新的XCode工具,所以没有必要单独安装它。
Enroll in the iPhone Developer Program .加入iPhone 的开发人员计划 。 There are two options here: $99 for the Standard Program, and $299 for the Enterprise Program.有两种选择浏览: 99美元的标准程序,以及299美元的企业计划。 The only real difference is that you can use the Apple Apps Store with the Standard Program, while Enterprise is only for in-house distribution.唯一真正的区别是,您可以使用苹果应用服务店的标准程序,而只是为了企业的内部分配。 Most will want to choose the Standard program.最希望选择的标准程序。
VERY IMPORTANT: When applying, you will be presented a choice for registering as a company or as an individual.非常重要:当申请,您将选择注册的公司或个人。 Choose carefully here, because you will not be able to switch easily.谨慎选择,因为你将不能轻易转。 If you already have your own business setup, you will most likely want to choose company.如果您已经拥有自己的企业安装,您将最有可能要选择的公司。
Wait until you get an email from Apple that lets you activate your iPhone program portal.等着,直到你收到一封电子邮件从苹果,让你激活你的iPhone计划门户。 It can take a day to a week for Apple to authorize individuals and last report was that companies can take as long as three months to be registered.它可以在一天至一周的苹果授权个人和最后一份报告认为,公司可能需要长达3个月内进行登记。 (I actually had to call the apple store at 1-800-MyApple and get transferred to the small business people who transferred me to the iPhone dev people who fixed the email for me when I still couldn’t get in after a week). (事实上,我已经打电话给苹果商店在1 – 800 – MyApple并移交给小企业的人谁转我对iPhone开发谁固定人民对我的电子邮件时,我仍然无法在一周后) 。
Send an email to Unity and request a Unity iPhone evaluation.发送电子邮件至统一 ,并要求统一iPhone手机的评价。 A real person has to read your email so again this may take a few days.一个真实的人已经阅读您的电子邮件,以便再次这可能需要几天时间。
[ edit ] Register your Device & Fetch App ID [ 编辑 ] 注册您的设备及撷取应用程序编号
Sign in to the iPhone program portal (this is what can take a week to get access to, it will show up as a button on the right side of your iPhone Dev Center page).登录到iPhone的程序门户网站(这是可以采取一个星期的获得,它会显示为一个按钮的右边你的iPhone 开发中心页) 。
Find the device ID of your iPhone or iPod Touch.找到的设备ID你的iPhone或iPod接触。 You can find out your device’s UDID using iTunes 7.7.您可以找到您的设备的UDID使用iTunes 7.7 。 or later.或更高版本。 To do this, connect your device to your Mac and launch iTunes.要做到这一点,您的设备连接到您的Mac和推出的iTunes 。 In iTunes, select your device in the ‘Devices’ section and navigate to the Summary tab.在iTunes中,选择您的设备中的’装置’节和浏览的简要标签。 Click on the Serial Number label to reveal the Identifier field and the 40 character UDID.单击的序列号标签,以显示标识符场和40个字符UDID 。 Press Command+C to copy the UDID to your clipboard.按Command + C复制UDID到您的剪贴板上。
In the program portal, click on “Team” and register yourself (here and elsewhere in the program portal there is a “How To” tab that holds context-sensitive help information for the current task)该计划的门户网站,点击“团队”和登记自己(在这里和其他地方的门户网站程序有一个“如何”标签持有上下文相关的帮助信息,目前的任务)
Click on “Certificates” and create a certificate that will be used to sign your application.点击“证书” ,并创建一个证书,将用于登录您的申请。 I found the instructions on the “How To” tab were enough to get me going.我发现上的指示, “如何”标签已足以让我去。
VERY IMPORTANT: later on, you need to download this certificate to your Mac so that xcode can use it to sign your projects.非常重要:后来,你需要下载该证书到Mac ,以便xcode可以使用它来登入您的项目。 No code can go onto an iPhone until it is signed.没有代码可以到iPhone手机,直到签署。 After you create a certificate you will see a button on the Certificates tab that lets you download it to your machine.在您建立您会看到证书上的一个按钮证书标签,您可以将它下载到你的机器。 Click on the “Download” button and install the downloaded certificate by double-clicking on it.点击“下载”按钮下载并安装证书通过双击它。 This will launch the Keychain Access application.这将启动钥匙扣Access应用程序。 Make sure you install to the login chain which should be selected by default.请确定您安装了登录链应该是默认选中的。
Click on “Devices” and add your device using the code that you copied out of iTunes above.点击“设备” ,加上您的设备使用的代码,复制出的iTunes以上。
Click on “App IDs” and add an ID.点击“应用程序名” ,并添加一个编号。 This is one of the steps that people commonly get wrong.这是一个步骤,人民普遍得到错误的。 First, App IDs need to be based on domain names (but backwards) and second they need to end in “.*” so if you have the domain waffles.com you want to list your App ID as com.waffles.* .首先,应用程序的ID必须是基于域名(但向后)和第二,他们必须结束在“ .* ”因此,如果您有网域waffles.com要列出您的应用程序ID作为com.waffles .* 。 When you are done and the App ID shows up in the list on the main page, Apple will have added a random identifier to the front of your text so that it will look like 8dbg88ga98gf89g.com.waffles.* .当您完成和应用程序编号显示在列表中的主网页,苹果电脑将增加一个随机标识符前线的文字,使它看起来就像8dbg88ga98gf89g.com.waffles .* 。
Click on “Provisioning” and create a provisioning profile.点击“配置” ,并创建一个配置的个人资料。 Again, I used the “How To” tab.同样,我使用的“如何”标签。
VERY IMPORTANT: you will need to add the provisioning information to your xcode project.非常重要:您将需要添加到您的供应信息xcode项目。 Download the provisioning information using the “Download” button.下载配置信息使用“下载”按钮。
Don’t worry about the “Distribution” tab yet.不必担心“分配”标签尚未。

[ edit ] Setup Unity iPhone [ 编辑 ] 安装统一iPhone手机
Launch the Unity iPhone app and see the sample project推出iPhone手机应用软件的统一和见示例项目
In the upper right hand corner of the view you will see the Player Prefs (you can find these later via Edit->Project Settings->Player).在右上角的看法,您会看到播放器偏好设定(您可以找到这些稍后通过编辑“项目设置, ”播放器) 。 You need to change the iPhone Bundle Identifier to get it to match both your App ID and to match the identifier in the xcode project (which we’ll be modifying shortly).你需要改变的iPhone束标识符使其符合您的应用程序ID和相匹配的标识符在xcode项目(其中我们将修改不久) 。 Assuming your App ID was 8dbg88ga98gf89g.com.waffles.* you want to change the iPhone Bundle Identifier to com.waffles.UnityRemote假设您的应用程序ID为8dbg88ga98gf89g.com.waffles .*要更改iPhone的束标识符com.waffles.UnityRemote
In the finder, double-click on Applications/Unity iPhone/Unity Remote/UnityRemote.xcodeproj在Finder中,双击应用/统一iPhone手机/统一远程/ UnityRemote.xcodeproj
With your iPhone connected to your Mac, you should see the device listed in the xcode organizer window.与你的iPhone连接到你的Mac ,您应该可以看到该设备中所列xcode主办窗口。
Select the device in the xcode organizer and click + to add a new provisioning to the device.选择中的装置xcode组织者和点击+添加新的配置到设备上。 Browse to the provisioning file you downloaded earlier.浏览到您的配置文件下载较早。
At this point, I was getting certificate not found warnings and had to power-cycle my iPhone to get it to register (hold the button at the top of the phone down for 5 seconds to power off, then repeat to power on) and I may have had to close and re-launch xcode but after that everything was fine.在这一点上,我获得的证书找不到了警告和权力周期我的iPhone手机,以获得注册(按住按钮上方的电话下降为5秒,切断电源,然后重复权力的) ,我可能不得不关闭并重新启动后, xcode ,但一切都被罚款。
From the xcode Window menu, select UnityRemote.xcodeproj (or if you had to close and restart xcode open it from the recent projects menu item)从xcode窗口菜单中,选择UnityRemote.xcodeproj (或者如果您已关闭并重新启动xcode打开它从最近的项目菜单项)
Select Device (rather than Simulator ) as the build target in the popup at the top left of the Xcode window.选择设备 (而不是模拟器 ) ,作为建设目标在弹出在左上方的Xcode窗口。
In the treeview, open Targets and select UnityRemote, then right-mouse-click and select Get Info.在TreeView中,打开目标,并选择UnityRemote ,然后右键单击鼠标,选择获取信息。 Go to the Properties tab and change the Identifier (NOTE: this is another one of the steps that people frequently get wrong).进入属性选项卡上,并改变标识符(注:这是另一种的步骤之一,人们经常得到错误的) 。 This identifier needs to match whatever you put in the iPhone Unity Player Settings iPhone Bundle Identifier field, which is this example is com.waffles.UnityRemote这标识符必须符合你的iPhone将在统一Player设定iPhone手机束标识符领域,这是这个例子是com.waffles.UnityRemote
[ edit ] Establish Network Connection [ 编辑 ] 建立网络连接
Click on the Air Port icon in your main menu bar and “Create Network…”点击图标,航空港的主菜单栏和“创建网络… ” to set up a wifi network (with a password) that you iPhone can connect to.设立一个WiFi网络(密码) ,您可以连接到iPhone手机。 You can only send apps to the iPhone over wifi (you can’t do it over a USB cable).您只能发送给iPhone的应用服务的无线(你不能做到这一点了一个USB线) 。
on the iPhone, click on Settings and join the new wireless network.在iPhone上,单击设置,并加入新的无线网络。
[ edit ] Run UnityRemote [ 编辑 ] 运行UnityRemote
Go back to xcode, find the UnityRemote.xcodeproj window, and click the “Build and Go” button.返回xcode ,找到UnityRemote.xcodeproj窗口,并单击“生成并返回”按钮。 xcode should build and sign your app and then you will see a notice on your phone that it is waiting for you to hit play in the editor. xcode应建立并签署您的应用程序,然后您会看到一个通知在您的手机上,它正等着你击中发挥的编辑器。
Switch to the Unity editor window and hit the play button in the lower-left-hand corner of the window.切换到统一编辑器窗口,然后按下播放按钮在较低左上角的窗口。
If you’ve done everything correctly, you should now be flying a ship around on your phone.如果您已经尽了一切正确的话,您现在应该船舶周围悬挂在您的手机上。 Note that what you see on the iPhone/iPod may be blurry.请注意,您所看到的在iPhone / iPod可能是模糊的。 This is because Unity Remote is streaming images rendered by Unity Editor to the device.这是因为统一是流远程图像编辑器所提供的统一的设备。 The blurriness is a result of compression artifacts.该blurriness是由于压缩文物。

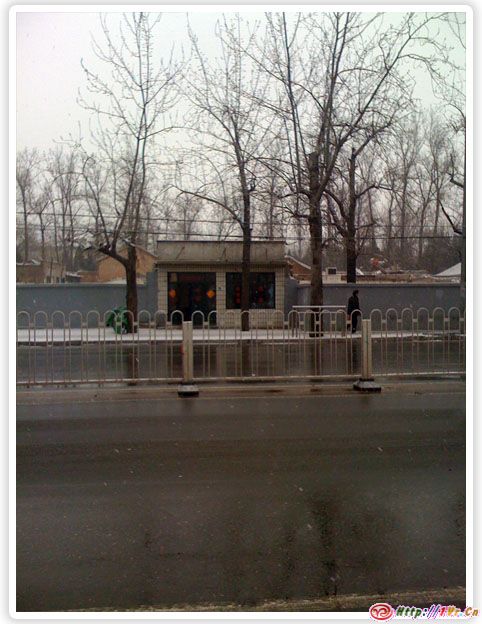
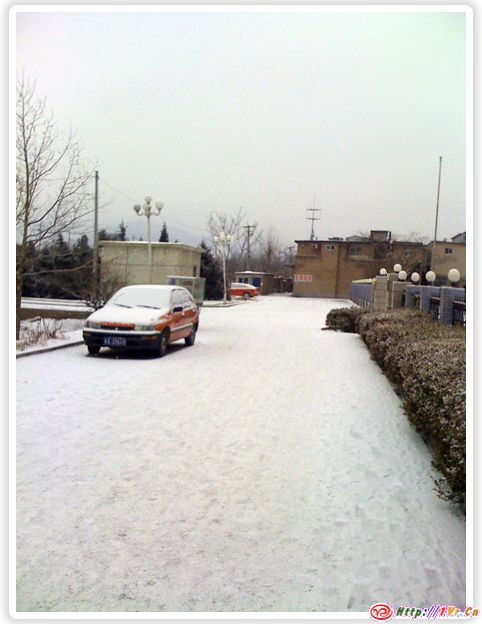
哟,下雪了!

早上迷蒙的醒来,真是不想起床啊.缺觉!我住的地方比较阴凉.走出屋门不抬头看不到今天天气那种.我一开大门.哇靠.顿时惊呆了.下雪了!!盼了好久.虽说这种小雪在我们东北基本算不上级别.但是能在这看到一场雪确实不容易.回到屋后我告诉我媳妇.我说外面下雪了.媳妇也很开心.我们都喜欢雪.不过现在我心里始终有个遗憾,就是07年3月在老家的那场大雪.没能亲身体会到.太可惜了!!后悔莫及.

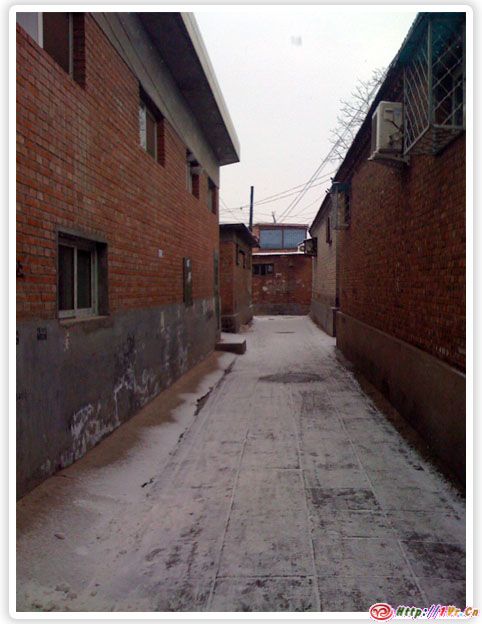
没有车辆压过的地方还算很有感觉.

还好,还好.让我感受了一小段有雪的路.

这张图你还能看出来是雪天么?好像能看出来点飘着的雪花.这么一会就化了.太不厚道了!

刚才一位同学说他上学时候学校组织扫雪,老师问他,你冷么?他回答.我冷.结果老师说,那你肯定没认真扫雪,扫雪不会冷的.

低调低调的晾晾晒

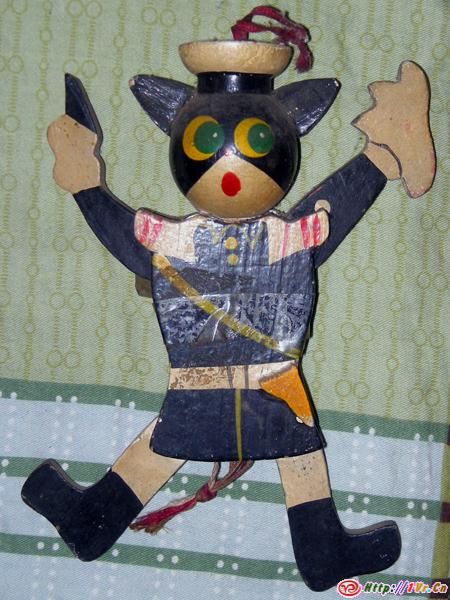
过年回老家,背本子回去的,虽然上不来网,合计怎么也能玩玩游戏吧.结果还忘记带鼠标了.我这个郁闷啊.无聊就想找以前被我藏匿的我出生100日的Luo照.把我小时候经常藏匿东西的几个宝箱翻了个遍.也没有找到.藏哪去了呢?就那么仅仅3,4张的童年照片.咋就让我弄没了呢.翻出了好多”古董”,还有我上学时候写的11本日记,这可都是秘密啊.

这是小时候我哥送我的玩具,下面有个小绳,一拽,黑猫警长的胳膊和腿就可以动.现在小孩怎么能玩到这么好的东西.可悲啊.

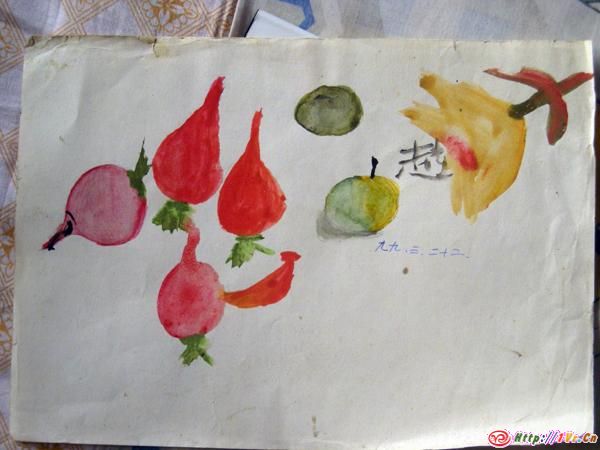
这应该是初中快毕业时候想考美师时候练习画的.还有有点才地,那应该是大萝卜吧?应该是.

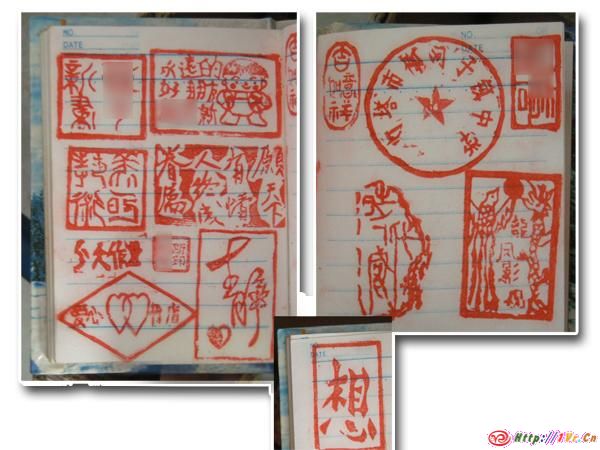
看到这些红红的大印章了吧?嘿嘿,这可是我亲手刻制的啊.这些应该是初中时候的杰作.用的是大橡皮.好像一块钱一块.然后用铅笔刀刻的.有几个”质量”还不错吧!嘿嘿.那个”今天作业”是为了记住老师每天留的作业,做的小本,但是上面没有标题.我就刻了一个印章批量印刷标题.看咱这”自动化”理念.还用了2块橡皮粘在一起仿刻的中学学校印章.印在作业本上.当作学校发的.哦耶.

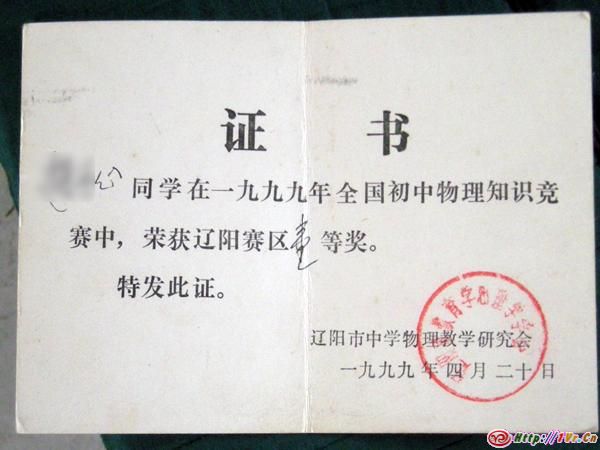
这是初中时候参加的一场物理考试,我是考真本事考来的,忘记学校有几个得这个证书的了.也不知道这个是不是很多并列第一的.印象深的一道题就是考电饭锅的原理.逗不?结果这个证书发的相当低调.都没引起心仪女孩的注意.我郁闷!!

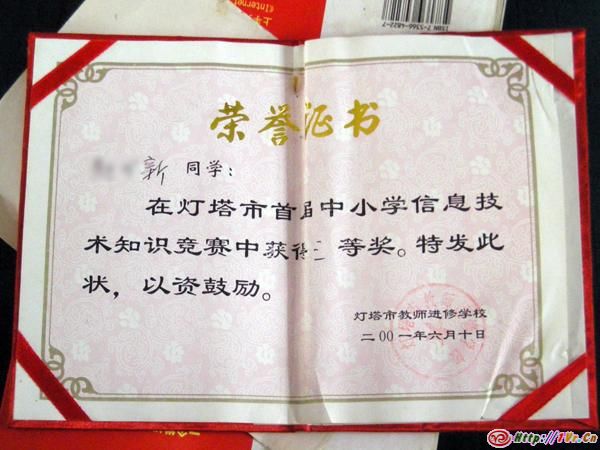
这是高中时候去参加一个计算机比赛时候获得的.全校算我一共去了2个人参赛.而我们学校是通过看谁一分钟打字快而抽选出来的.去考试还没上机,就写了一张卷纸,具体什么内容早忘记了.而俺们学校就俺取得了这个证书.结果学校也没广播一下.课间的时候,同学递来的,我还是很郁闷啊.咋发个证书也这么低调啊!我就为了引起美女的注意才这样.咋能这么就颁发给我啊!!

嘿嘿.学生时代很美好.我还想再去上学.多好啊.你想么?上学的孩子们.别怪大人苦口婆心说上学好.你们不在意.可是真的是上学好啊.珍惜啊.把学生时代过的在充实点吧.

亲手打造山寨版迷你公交IC卡II

今天是情人节.送玫瑰太土太俗.送媳妇点啥特别的礼物呢.干脆还是打造世界上独一无二的礼物吧.哈哈.

吸取失败的教训,翻阅了非接触式IC卡的原理,得知那线圈不知是是发送或者接受信号用,也是用来感受磁场产生IC卡的工作电流的.卡既然已经挂了,干脆死马当活马医吧,再重新计划试一次.

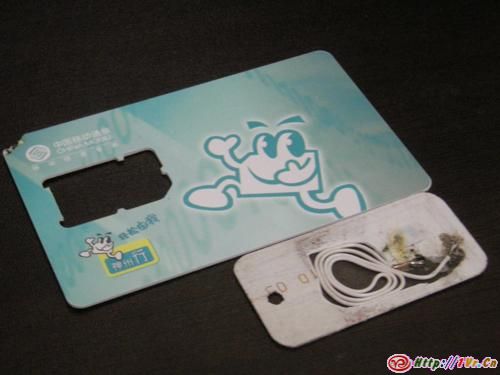
首先把昨天失败的卡的不干胶揭掉,找一张类似的卡片,我找到一张神州行卡片.

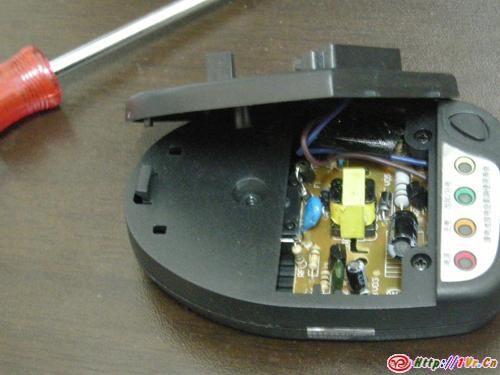
因需要很长的导线作为感应线圈.所以我需要找到很长又很细的漆包线.有个废旧的耳塞机,但是还是不够长.即使长度够剥皮也很困难.后来找到一个早已不用的手机充电器.里面应该有变压器.

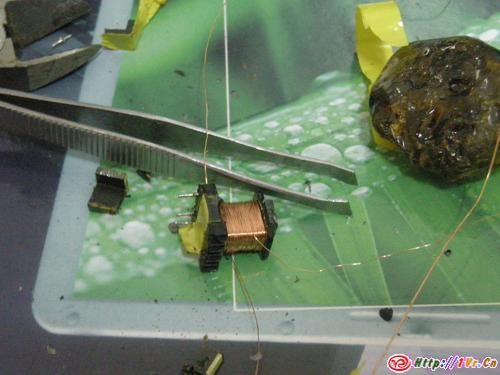
拆出变压器,看到漆包线,长度和粗细很让我满意.哈哈.很合适.

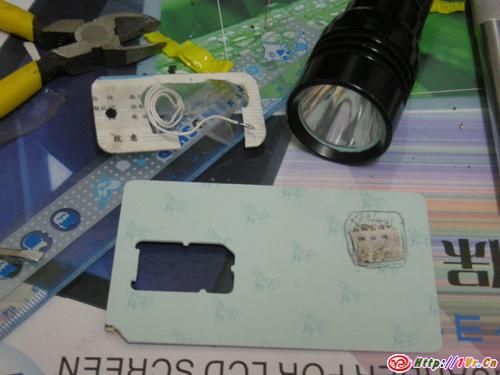
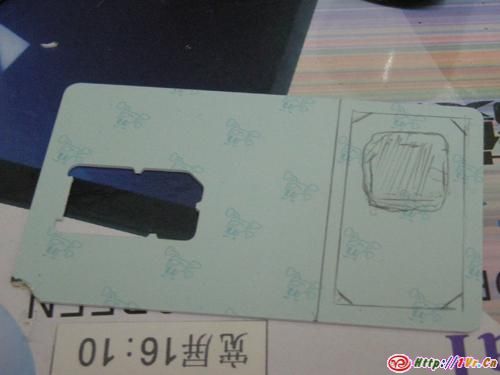
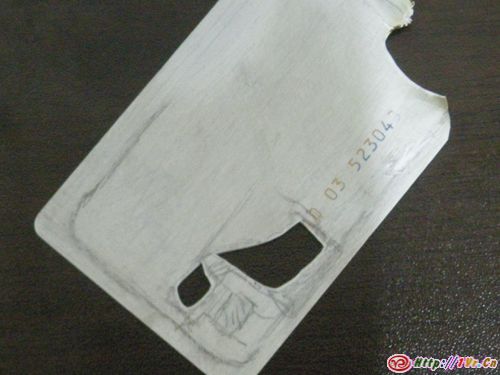
把昨天DIY的结果再次处理一下,只留芯片和短短的两个线头部分.因为芯片上的塑料不小心让烙铁烫到了,而且芯片的边缘有个裂痕.我很担心芯片挂了.但是担心是没用的.硬着头皮继续.用铅笔勾勒一下,大概确定一下这次迷你卡的大小.

因为要缠线圈.为了让卡最终不会太厚,将要缠线圈的地方做好标记.

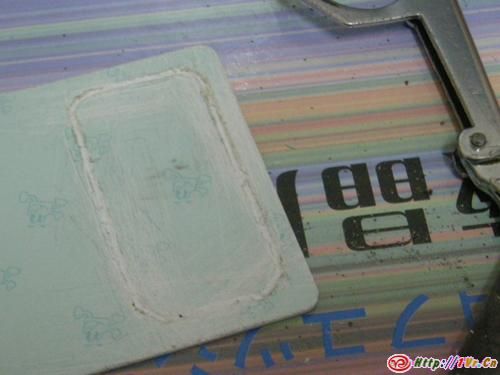
没有合适的工具,用剪刀和烙铁头进行挖槽.这个地方做的很粗糙.不满意.

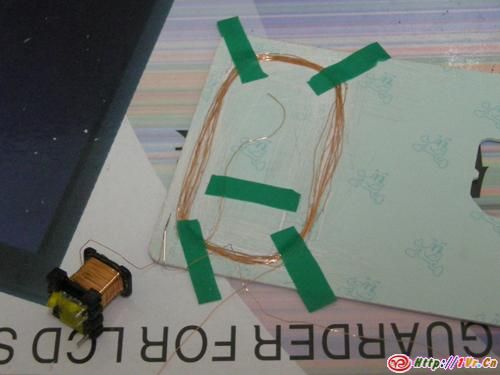
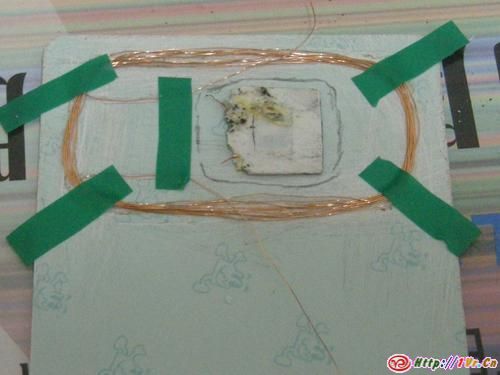
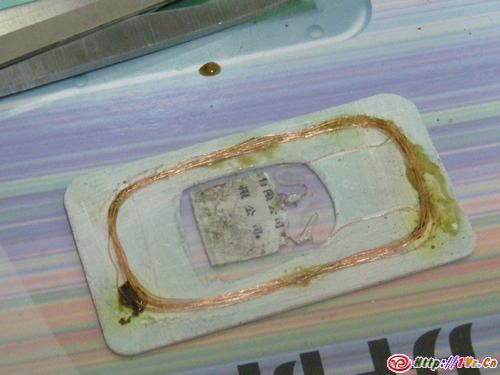
看非接触式IC卡的原理,这线圈关系到通过感应磁场来产生IC卡工作的电流.我猜这东西会不会有正负极?所以谨慎起见,我仔细辨别了原来卡的线圈的缠绕方向和芯片的接脚顺序.按照原来卡的大小,估算了一下导线的总长度,原来大概缠绕了5圈.总长度大概是125cm.按照迷你卡的线槽的周长来算.我需要缠绕9圈左右.找一点胶带辅助固定,一圈一圈的盘漆包线.缠了10圈好像.

再确认一下芯片的大小位置.要挖个洞来嵌入IC卡芯片.

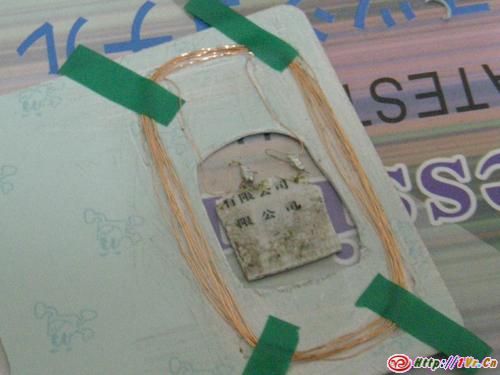
进行焊接,焊接好之后,把芯片放入神州行卡上面的洞里.

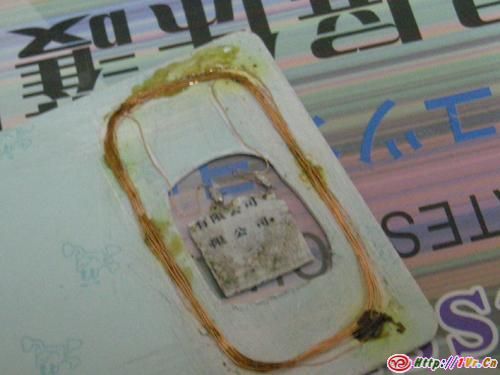
把辅助的胶带慢慢去掉,用松香将线圈固定住.并且用透明胶带把芯片和神州行卡固定好.

裁切卡形状,这将是山寨迷你卡的最终大小.

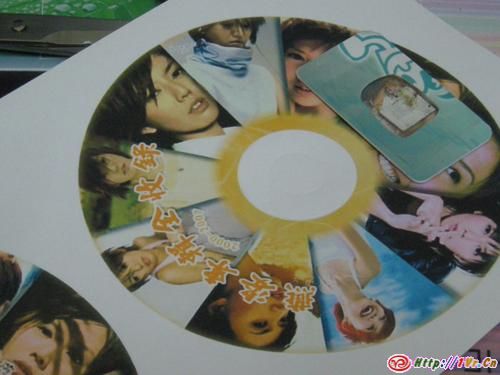
正好找到以前我燕姿网站印的体恤时候做的燕姿MP3专辑盘的盘皮.用来做迷你卡的封皮应该不错.放了有两年了.不是很粘了.宽度正合适.

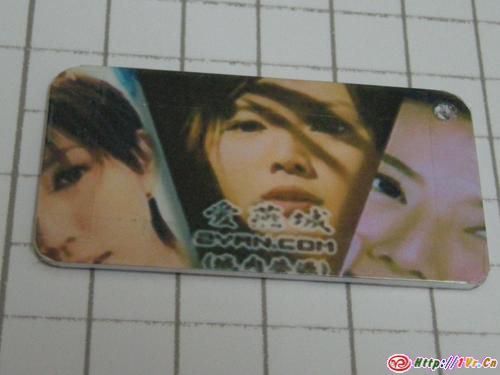
裁切封皮,把两个面都美化美化.呵呵.我是姿迷.

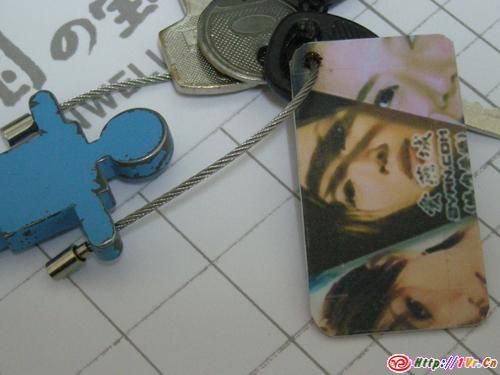
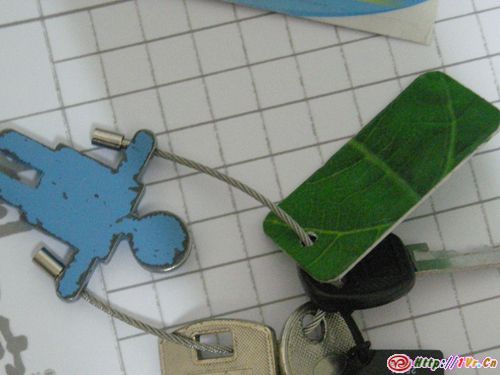
打孔穿在钥匙串上.收工!

和媳妇冒着好几级的大风跑出去坐公交买东西,顺便测试卡片.今天真TM冷啊.这风.嗖嗖的.真疯了.刷卡时候那个激动啊.滴的一声,读卡器响了.刷卡成功.哈哈.山寨迷你公交卡改造成功.

后来就是媳妇下命令.这卡归俺媳妇了.情人节礼物..哦耶…我就是这么想的..

亲手打造山寨版迷你公交IC卡I

这几天总看到有人使用那小小的公交卡,迷你公交卡我查询了一下价格,不菲啊.最便宜也得60多呢.手里的公交卡已经快面目全非了.余额也只剩8元多了.无聊索性来次diy吧.

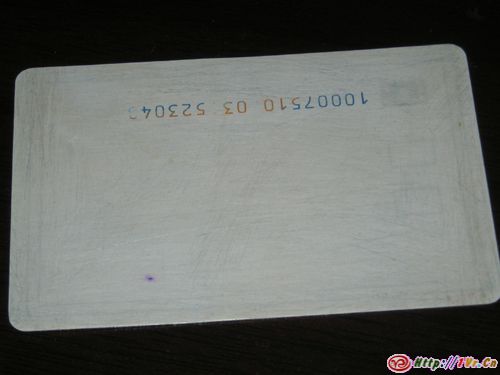
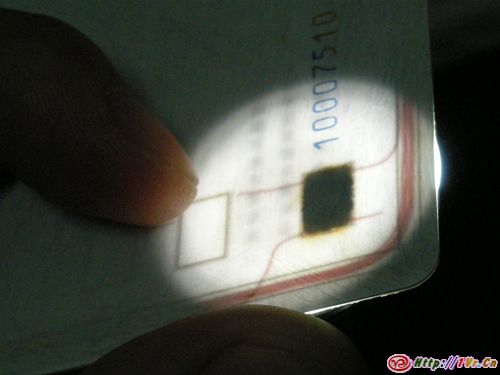
这是我的公交卡,上面的图案早已经被我无聊打磨下去了.用砂纸砂的.然后用电筒确定卡里面的布线.

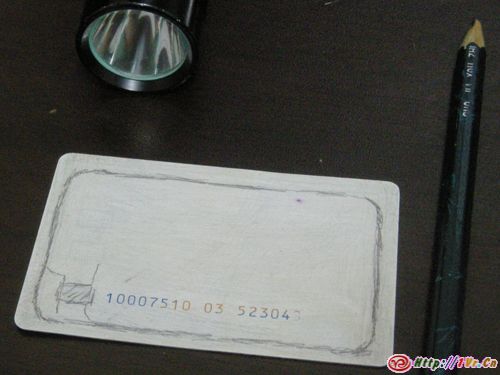
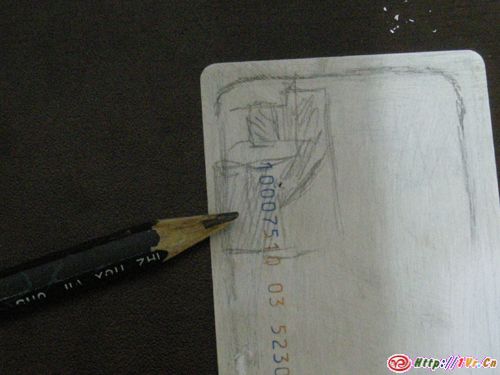
看到布线以后,用笔做好标记.

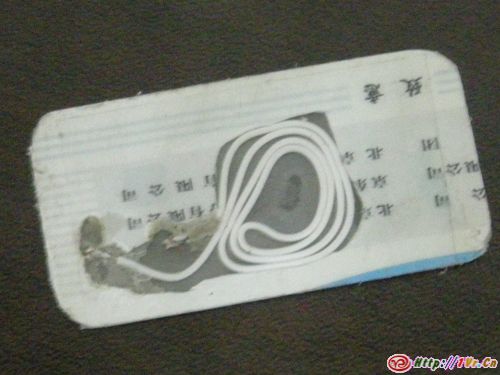
按照预先我的计划,先测试出方法.我想的就是用电烙铁融化塑料,线路是不是就暴露出来了?而且从电筒的透射来看,里面的线不是很细.结果实际融化塑料这招儿的效果不是我预计的效果.塑料都堆了一堆儿,像大便似的.硬硬的.难以取出电线.然后尝试用打火机烧并用镊子拽融化的塑料的方法产生了点效果.看到了漆包线.大概5股.按我的理解应该作为射频天线用的,应该是个通路线圈.但是漆包线的直径又给我打击了,太细了.心里有些没底了.

确定好剥线思路后开始处理芯片附近部分.这可是正式工作了,还是用笔做好挖洞区域的标记.

使用剪刀及刻刀进行挖洞.很小心.把损坏了漆包线以及主要的芯片.

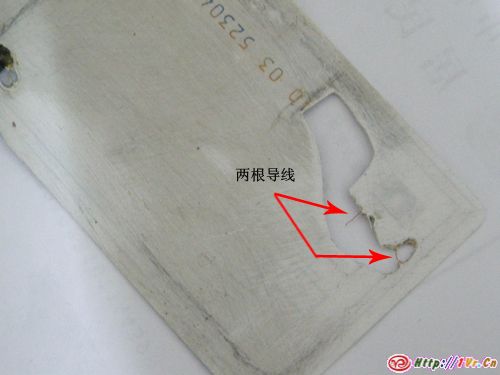
废了好大力气,忍受着塑料的味道才剥离出来连接芯片上的2个小线头.真不容易啊.我的方法是按照线路标记用见到挖洞,给漆包线周围留一点点塑料包裹.然后用烙铁加热这点儿塑料,并且配合镊子拔掉融化的塑料,漆包线就露头了.这一步非常不容易.看到图中的两个小小的线头了吧.

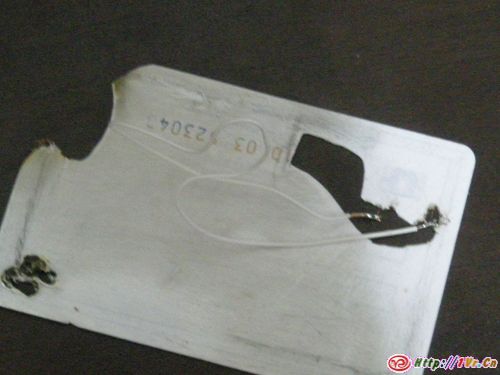
把两个漆包线的线头去漆,我用刻刀一点点刮的,怕弄断了.然后上锡.重新接了一段导线.

将新接的导线慢慢的排列到卡的洞洞里面去.便于排列,背面用胶带做了映衬.

最小化裁切出迷你卡的外形,没有特殊设备.我只能拿剪子剪了.为了打孔,稍微留长了一点点.

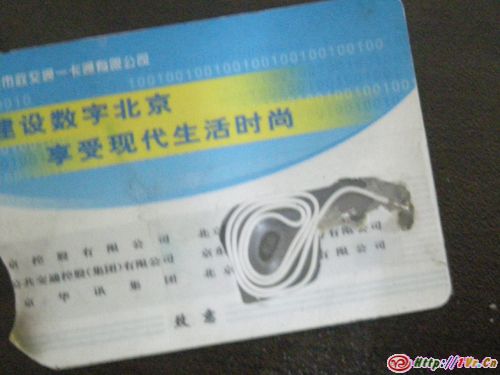
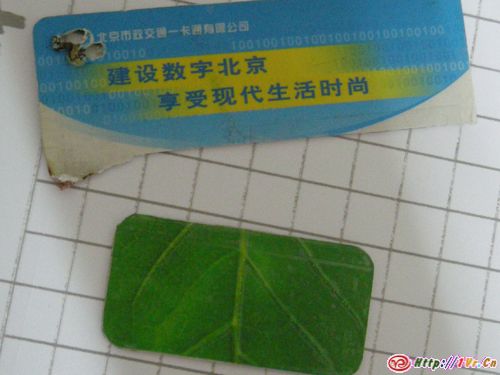
找个漂亮的不干胶做外皮贴上去,覆盖卡上的漏洞部分.身边临时找不到好看的不干胶了,最好把贴在墙上的墙纸的一个向日葵的叶子揭了下来包裹在卡上了.

最后在空地方打一个孔儿,作为钥匙串的一部分吧.迷你公交卡DIY完成!

从昨晚的九点一刻开始直到零点结束.耗时近3个小时.然后期待今天早晨的实际测试.怀着紧张的心情我上了公交车.兜里也早就准备好了2枚一元硬币.可测试结果很让我伤心.一点反应都没有.卡坏了.

后来我寻找原因.分析出两个原因.具体因为什么我无从考证.一是可能我后接的导线长度和排列顺序不符合IC的要求,具体要求规范我也查不到.二是我翻阅我拍摄的相片,发现接完导线之后排列导线的时候芯片那里有烙铁烫过的痕迹.别且发现芯片的一边塑料有黑色的裂痕.很大可能是因为芯片被我不小心碰坏了.所以公交卡坏掉了.不过我还挺心痒痒.谁再贡献给我一张公交卡让我重新测试一下我的想法啊????

让我媳妇给我买了一张新的公交卡.真烧包啊.嘘….

网友帮查了一下资料.发现我接的导线思路就是错误的.它类似发电机似的,需要产生电流的.郁闷.非常郁闷.本质上的错误.

系统由卡、读卡器和后台控制器组成。工作过程如下:
(1)读卡器将载波信号经天线向外发送;
(2)卡进入读卡器的工作区域后,由卡中电感线圈和电容组成的谐振回路接收读卡器发射的载波信号,卡中芯片的射频接口模块由此信号产生出电源电压、复位信号及系统时钟,使芯片“激活”;
(3)芯片读取控制模块将存储器中的数据经调相编码后调制在载波上,经卡内天线回送给读卡器;
(4)读卡器对接收到的卡回送信号进行解调、解码后送至后台计算机;
(5)后台计算机根据卡号的合法性,针对不同应用做出相应的处理和控制。

虚拟还未变成现实

早晨坐车突然想起我的职业,虚拟现实.以前总头疼怎么和家人描述我的工作.后来我只能笼统的说比动画高级点,比游戏低级点.从工作到现在,有7年了.幸运的是从工作就接触虚拟现实,可是这么多年过来了.虚拟的变成现实了么?虚拟终究是虚拟,假的还是很假.不知道还要多久才能真正的问闻听全面感受.这算不算虚拟现实的悲哀?而现在的我,又被游戏制作拉了过去.是虚拟还是现实还是游戏.还是朦胧.我继续糊涂下去.

媳妇的iPhone是美版,也就是有锁版.内置卡贴的.也不知道当初买的时候怎么想的.怎么买了个内置卡贴.即使是为了便宜,买个外置卡贴的也好啊.软解出来这么久了.迟迟没敢下手.我手痒痒,想自己拆除卡贴.媳妇不让.怕我弄坏了.昨晚趁她不在.我拆啊拆.哈哈.好刺激.iPhone的做工真的没得说.精密精细.里面都可以算艺术品.各个插头还用了标识.指引拆卸的顺序.大概用了半个多小时时间,才拆除卡贴并且还原了iPhone,媳妇回来说如果她的让我拆坏了,就把我的也砸了..然后刷机到2.2固件并且用黄雪进行软解.耐心的等待寻网后.信号出现了.成功软解.哈哈.这是我拆的最贵的玩具了.再此之前是拆那个全新的尼康数码相机(有兴趣的可以搜索我博客”相机”).因为第一次拆,有点紧张.只录了视频.还不是很清晰.后悔没拍照啊.截几张图上来.


拆解中


屏幕部分


后盖部分


卡贴!!!

看那黄黄的卡贴.越看越郁闷.怎么买内置的!失算啊.失算.不过还好,成功拆解出来.省了一小笔银子.

想在iPhone上开发一个魔方游戏.后来上网一查.NND,怎么那么多变态的魔方游戏.我晕!

iPhone实时调试Unity3D程序的方法

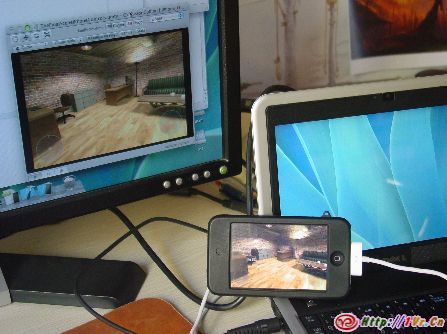
从开始接触iphone版我就很好奇这个实时调试.今天终于搞定了(2008.1.8).啊哈哈.下面是一个老外的帖子.机械翻译了一下.会了实时调试,才知道一切都和想象中的不一样

上面图片是Unity3D QQ群里一位兄弟发的.下面2个视频是我录的

http://www.youtube.com/v/DlS9ETJZNvw&hl=zh_CN&fs=1&ap=%2526fmt%3D18
http://www.youtube.com/v/NnbsVrwcBz0&hl=zh_CN&fs=1&ap=%2526fmt%3D18

至于有人需要帮助,以下是我安装统一远程运行与我的苹果iPhone手机的基本统一。
1. 1 。 Assuming you’ve already created the provisioning profile, and succesfully installed iPhone apps on your device, you just need to double-click the UnityRemote.xcodeproj in the UnityRemote folder of your Unity iPhone install directory. 假设您已创建的配置配置文件,并成功安装了iPhone手机应用服务在您的装置,你只需要双击UnityRemote.xcodeproj在UnityRemote文件夹的统一iPhone手机的安装目录。
2. 2 。 This will launch xcode where you then click “Build and Go”. 这将启动xcode你,然后点击“生成并返回” 。 The app should then be installed to your iPhone. 应用程序,然后安装到你的iPhone中。
3. 3 。 Create a shared wireless network on your Macbook by clicking the Airport icon and choosing “Create Network…”. 创建一个共享的无线网络上的苹果按一下机场的图标,并选择“创建网络…”. Here you can give it a name and password, then click “OK” 在这里,您可以给它一个名称和密码,然后单击“确定”
4. 4 。 On your iPhone, choose Settings > Wi-Fi and choose the new wi-fi network you just created. 对你的iPhone中,选择设置“ > Wi – Fi和选择新的Wi – Fi网络您刚刚创建。
5. 5 。 Now click the Unity Remote app on the iPhone, and you should see your Macbook name listed. 现在单击统一的远程应用程序在iPhone上,你应该会看到您的苹果名称列出。 Click the machine name, and then on your Macbook, with Unity iPhone running, press Play. 单击计算机名,然后在您的苹果, iPhone手机与统一运行,按下播放。
Now you’ll be able to control the application with the iPhone wirelessly. 现在您就可以控制的应用与iPhone的无线。 You’ll also see a low-res version of the app on the iPhone itself. 您也会看到一个小水库版本的应用程序在iPhone本身。
Good luck and happy iPhone developing! 祝你好运和幸福的iPhone手机发展!
iBrent iBrent